How to access modern commanding in a model driven app using Power Apps
Using Power Fx with modern commanding in a model-driven app provides a powerful and straightforward approach to creating and managing custom commands without delving into complex JavaScript or the need of using the Xrmtoolbox and the Ribbon Workbench.
Power Fx allows you to write expressions that execute when a command is triggered, similar to formula expressions in Excel. Here’s how to use Power Fx for modern commanding in a model-driven app on the Accounts Main form.
Step 1: Open Your App in Power Apps Studio
- Log into make.powerplatform:
- Choose Your Environment: Ensure that you are working within the correct environment.

- Find your solution Navigate to Solutions in the left menu. Open the solution where you app is located.
- Open Your Model-Driven App: Select the model-driven app you want to modify.
Step 2: Add or Modify a Command
- Access Command Designer: In the model-driven app select Edit commandbar on the Account view in the sitemap. Select main form to add the command to the Account form

Step 3: Use Command Designer for Power Fx
- Create a New Command or Edit an Existing One: Open the command designer and either create a new command or select an existing command to modify. If you want to create a new then in the top menu select New → Command. A new button with the text NewCommand is now added to the command bar.

- Configure Command Properties:
- Label: Set the user-facing name for the command.
- Icon: Choose an icon to appear on the button.
- Tooltip: Provide a brief description of what the command does.
- Assign Power Fx Expression:
- Action Type: Choose “Power Fx” as the action type for this command.
- Enter Power Fx: Write your Power Fx formula in the provided field. This could involve navigating to another page, setting a field value, creating a new record, or more complex logic.
- Example of Power Fx action:
Notify('Hi there')To print a text message at the top of the screen.

Step 4: Define Visibility and Enablement Rules (Optional)
- Visibility Rules: Use Power Fx to define conditions under which the button should be shown. For example, you might only show a button if certain field values meet specific criteria.
- Enablement Rules: Similarly, you can set conditions that determine when the command is enabled or disabled based on data context or user roles.
Step 5: Save, Validate, and Publish
- Save Your Command: After configuring the command with Power Fx, save the changes in the command designer.
- Publish Changes: Ensure all changes are published so that they reflect in the app. You need to publish both in the command designer and in the component library.
- Test the Command: It’s crucial to test the new or modified command in the app to ensure that the Power Fx formula behaves as expected.
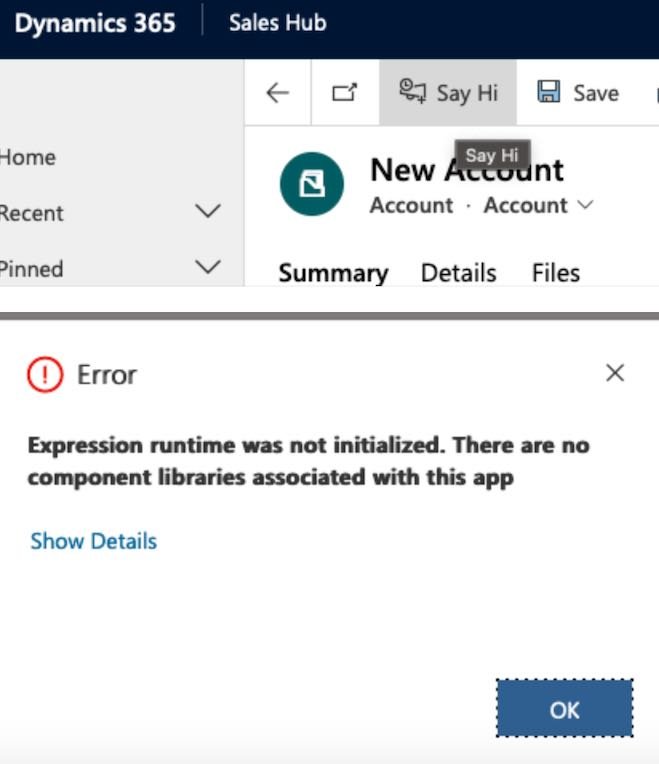
- Component library missing If you get this error when trying to play the app Open the components library, button in top menu and click publish. This will add a component library to the solution. When you later want to make changes to the command library you can access it directly from the solution.


5. What it will look like when the user clicks on the “Say Hi” button.

Example of another Common Power Fx Command usage
To provide a clear example, if you wanted to create a command that opens a new contact form when clicked, your Power Fx command might look like this:
Navigate(NewForm, 'Contacts')This formula would instruct the app to navigate to a new form for creating contacts.
By using Power Fx in modern commanding, you can significantly streamline the process of adding dynamic behavior to your model-driven app’s UI, making it easier to manage and more intuitive for users. This approach allows for rapid development and deployment of new features within your apps.
Das war das!


